There is a particular kind of defeat that every landscape photographer knows. You wake before the alarm, drive out in the dark, stand in cold water or on a frozen ridge, and you wait. The light does something extraordinary. You feel it in your chest. You drive home believing you’ve got something real. Then you open the raw file and it looks flat, murky, or blown out, and you start pushing sliders around hoping something sticks. An hour later you’ve made it worse.
I’ve been shooting landscapes full-time for twenty years, and I still catch myself falling into old habits when I sit down at the computer after a long shoot. That’s why this tutorial from William Patino landed for me. Watch the full tutorial on YouTube – it’s one of the more honest breakdowns of raw editing I’ve come across, built around a backlit seascape with serious dynamic range to wrestle with. He names the mistakes plainly and shows what to do instead, using a simple three-part framework that I’ve found myself recommending to students at my own workshops.
The framework is LCL: Light, Color, Local Adjustments. Work through them in that order, and you stop chasing your tail.
Step 1: Resist the Auto Button
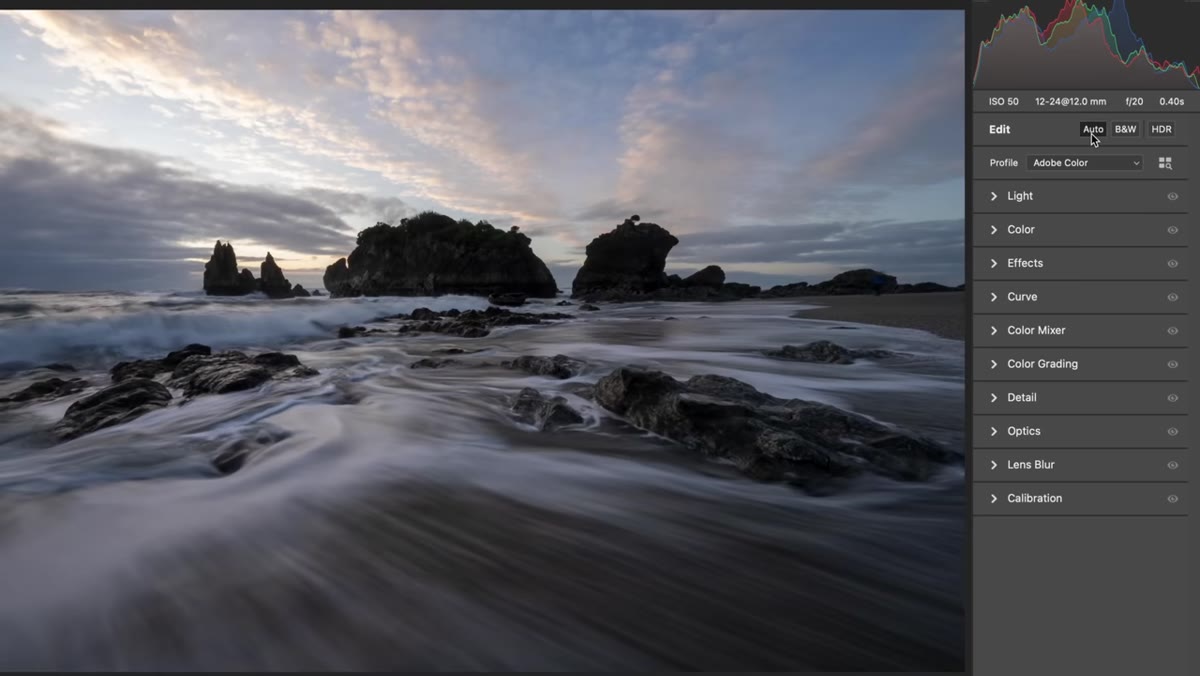 Auto button highlighted in Lightroom’s Basic panel
The first thing Patino addresses is the habit of hitting Auto to get a starting point. His analogy is blunt and accurate: it’s like throwing random ingredients into a blender and hoping for a good meal. Sometimes it lands close. More often you end up with a result that has three things you like and two things that are now baked in, and you’re working backwards trying to undo them.
Auto button highlighted in Lightroom’s Basic panel
The first thing Patino addresses is the habit of hitting Auto to get a starting point. His analogy is blunt and accurate: it’s like throwing random ingredients into a blender and hoping for a good meal. Sometimes it lands close. More often you end up with a result that has three things you like and two things that are now baked in, and you’re working backwards trying to undo them.
I refuse to use auto mode on anything, cameras included, and that philosophy carries into post. Starting manually, even if it takes a few extra minutes, means every adjustment you make is one you understand and chose. That’s how you build the muscle memory to work faster and better over time. Start with all sliders zeroed and approach the file fresh.
Step 2: Apply a Camera Profile First
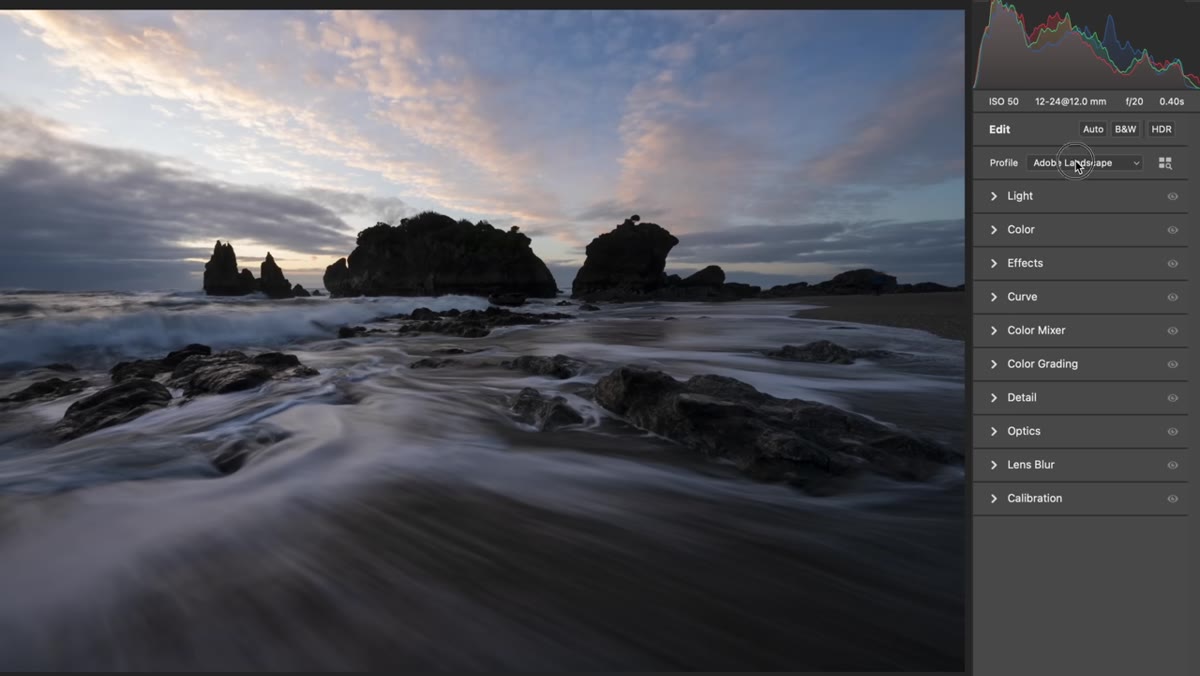 Camera Profile dropdown showing landscape profile selected
Before touching a single exposure slider, Patino applies a landscape camera profile. This sits inside the Camera Calibration or Profile section depending on your version of Lightroom or ACR, and it makes a quiet but worthwhile difference. A landscape profile applies a gentle push to color rendering and recovers a touch of shadow detail without doing anything dramatic.
Camera Profile dropdown showing landscape profile selected
Before touching a single exposure slider, Patino applies a landscape camera profile. This sits inside the Camera Calibration or Profile section depending on your version of Lightroom or ACR, and it makes a quiet but worthwhile difference. A landscape profile applies a gentle push to color rendering and recovers a touch of shadow detail without doing anything dramatic.
Think of it as setting the table before the meal rather than seasoning at the end. It gives you a more accurate foundation to work from, particularly in high-contrast scenes where the default Adobe Color profile can flatten the midtones. It takes ten seconds and costs nothing.
Step 3: Work the Light Tab with Restraint
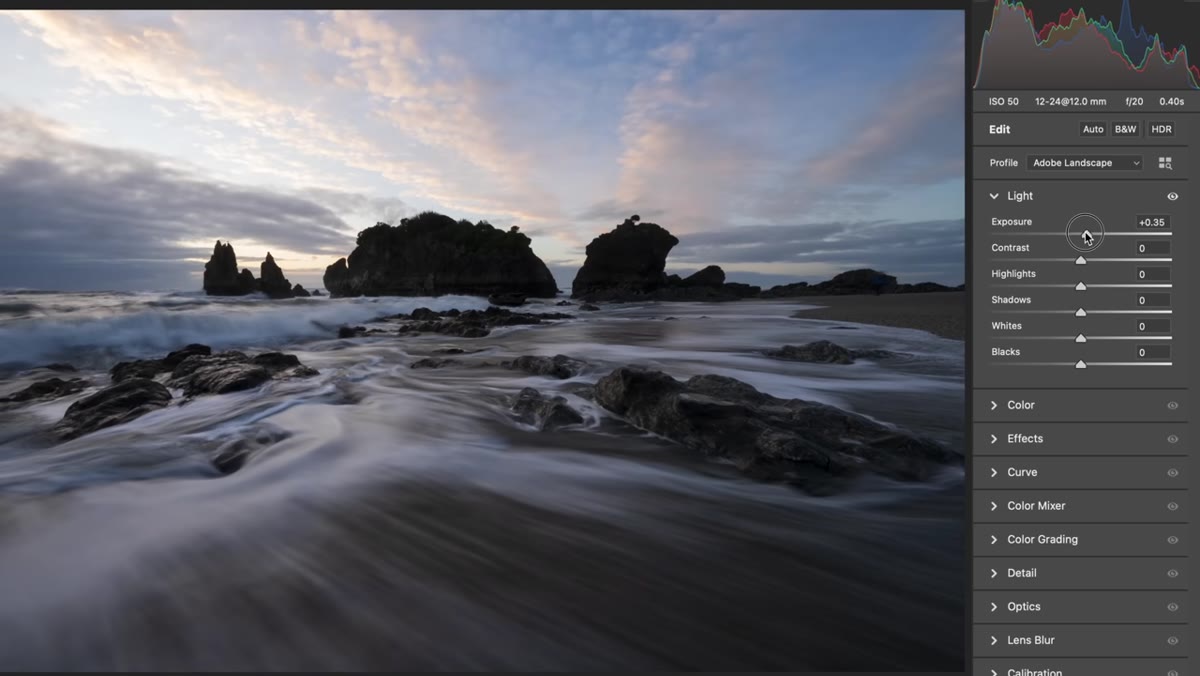 Exposure and Highlights sliders being adjusted in Basic panel
Now you’re in the Light or Basic panel, and this is where most people overcook it. Patino’s advice here is the most important thing in the video: global adjustments affect every single pixel. When you drag Highlights down to recover a bright sky, you’re also dragging the specular reflections off the wet sand, the catch light in a wave, the rim light on a rock formation. The image loses dimension.
Exposure and Highlights sliders being adjusted in Basic panel
Now you’re in the Light or Basic panel, and this is where most people overcook it. Patino’s advice here is the most important thing in the video: global adjustments affect every single pixel. When you drag Highlights down to recover a bright sky, you’re also dragging the specular reflections off the wet sand, the catch light in a wave, the rim light on a rock formation. The image loses dimension.
His approach is a modest exposure lift to bring up the overall tonality, followed by only gentle highlight and shadow recovery at the global level – enough to stop the histogram clipping, not enough to flatten the image. The heavy lifting on dynamic range comes later, locally. I’ve started telling my workshop students to treat the global sliders like a rough sketch and local adjustments like the actual painting.
Step 4: Calibrate Color Without Oversaturating
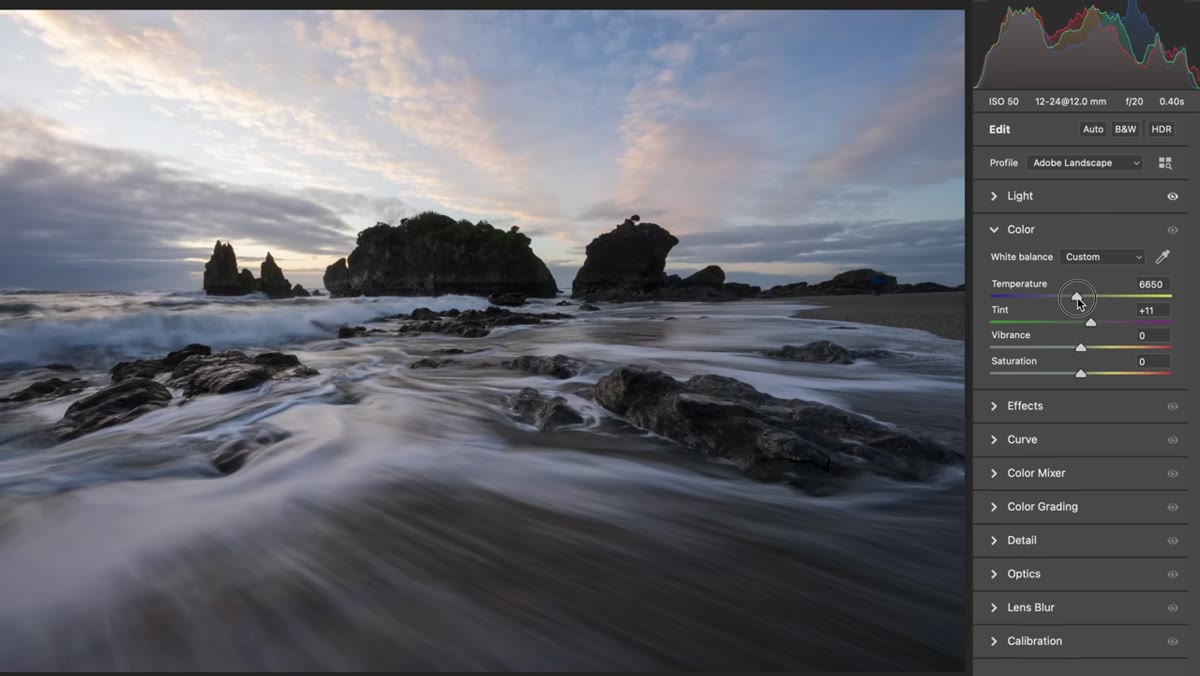 Vibrance and Saturation sliders in the Color panel
Moving into the Color panel, Patino adjusts white balance and tint to match what the scene actually felt like, then sets Vibrance and Saturation with a light hand. His working ranges are a useful anchor: Vibrance somewhere between 0 and 30, Saturation between 0 and 10, adjusted to taste depending on the file.
Vibrance and Saturation sliders in the Color panel
Moving into the Color panel, Patino adjusts white balance and tint to match what the scene actually felt like, then sets Vibrance and Saturation with a light hand. His working ranges are a useful anchor: Vibrance somewhere between 0 and 30, Saturation between 0 and 10, adjusted to taste depending on the file.
The distinction between these two sliders matters. Saturation lifts every color uniformly, which can push already-strong hues into neon territory quickly. Vibrance targets the less-saturated tones first, so it tends to feel more natural in landscape work, especially in golden-hour scenes where the warm tones are already doing a lot. I’ve found that pushing saturation past 15 on a sunset file almost always makes the sky look like a theme park.
Step 5: Use Local Adjustments for Dynamic Range Control
 Gradient mask being drawn over sky area
This is where the real editing happens. Rather than trying to balance a high-dynamic-range scene with global sliders, Patino uses local adjustments – gradient masks, radial filters, or brush tools – to treat different zones of the image independently. Pull the sky back without touching the foreground. Open the shadows in the rocks without washing out the water. Control the depth of the scene intentionally rather than hoping the globals average out.
Gradient mask being drawn over sky area
This is where the real editing happens. Rather than trying to balance a high-dynamic-range scene with global sliders, Patino uses local adjustments – gradient masks, radial filters, or brush tools – to treat different zones of the image independently. Pull the sky back without touching the foreground. Open the shadows in the rocks without washing out the water. Control the depth of the scene intentionally rather than hoping the globals average out.
If you’re new to masking, start with linear gradients: one covering the sky, one for the foreground. Make them generous and overlap them in the midground. From there you can refine with luminosity masking if the scene demands it. The goal is to make the image look the way your eye experienced the scene, not the way a single flat exposure recorded it.
A Note From My Own Practice
I shoot in the high desert outside Bend, Oregon, where the light can swing from deep blue shadow to blinding reflected rock within the same frame. The LCL workflow Patino outlines maps cleanly onto that kind of scene. The one thing I’d add from my own experience is this: make your local adjustments before you finalize your global ones. I used to do it the other way around, and I kept having to go back and re-tune the globals after the masks changed the image balance. Working light globally first, then going back and confirming after local work, keeps the process cleaner.
I’d also suggest saving a version of the file before you start local work. Not because you’ll necessarily need it, but because it trains you to see the difference clearly. Over time, that comparison makes you faster and more intentional.
The single most important thing I took from this tutorial is the reminder that every global slider in Lightroom is a blunt instrument. Precision lives in local adjustments. Get the broad strokes right at the global level, keep your hand light, and do the real work with masks. That’s the difference between an edit that looks manipulated and one that looks like the place you were actually standing.
Watch the full tutorial on YouTube to see Patino walk through a complete edit from start to finish – it’s worth watching the end especially, where he applies the whole workflow clean, without the mistakes, on the same seascape file.
Comments
Leave a Comment